
 Author: Pavel Chumachenko, Software Engineer
SugarCRM is intrinsically very powerful tool. However, it may become even more efficient when properly customized. So, we proceed with our topic of SugarCRM customization, and today’s tutorial is aimed at SugarCRM administrators. It provides the necessary concept of how the operation of the Global Search mechanism is arranged. It also constitutes the guide for setting up the quick search prior to its first launch.
The material presented in this customization tutorial assumes that you already have an installed SugarCRM product, an expanded ElasticSearch, and an account with administrative access.
In writing the tutorial, the following software was used:
- SugarCRM 7.6
- ElasticSearch 1.3.1
Abbreviations
- DB –Database
- ES – ElasticSearch Server
- GS – Global Search
Step 1. Verification of the ES Server
Before we start our SugarCRM customization, it is necessary to check whether SugarCRM is able to turn to the ElasticSearch. To do this, you should go the following way:
1 | Admin -> System -> Search |
In this window, find «Full Text Search Settings» section (Figure 1) at the bottom of the page. The first thing you need to pay attention to is whether the fields «Host» and «Port» are filled.
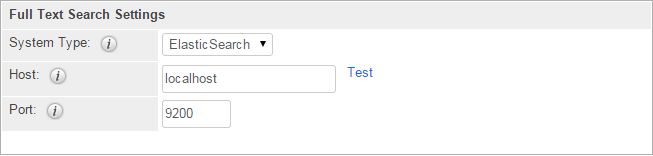
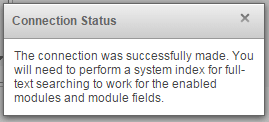
If the fields are filled, perform verification of the ES server by clicking «Test» link. Upon successful verification, you will get a pop-up message shown in Figure 2
There were some cases in my practice when the values of fields «Host» and «Port» were not saved upon amendment. Such a problem occurs when file config.php or config_override.php does not have permission to read/write. In this case, you can assign attributes «Host» and «Port» manually. To do this, add the following lines to config_override.php file:
1 2 | $sugar_config['full_text_engine']['Elastic']['host'] = 'localhost'; $sugar_config['full_text_engine']['Elastic']['port'] = '9200'; |
where the values of “localhost” and “9200” should be replaced by your own.
Sometimes, after clicking «Test» button, the ElasticSearch verification process fails or hangs. If you are sure that ES is set up properly, you should add the following line to config_override.php file:
1 | $sugar_config['full_text_engine']['Elastic']['valid'] = true; |
Note:
After modifying config_override.php file, there is no need run «Quick Repair and Rebuild» operation. The values will be uploaded in «Full Text Search Settings» form automatically after reloading the page.
2. Choice of Modules on Which GS Will Be Performed
Next step is to determine Sugar CRM modules, which will be involved in the use of Global Search mechanism. To do this, go the following way:
1 | Admin -> System -> Search |
Here, at the top of the screen, we have 2 columns: Enabled Modules and Disabled Modules – Included and Excluded GP modules, respectively (Figure 3).
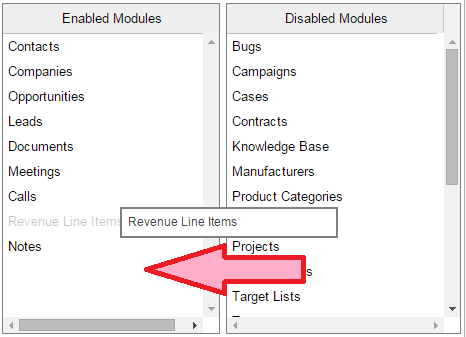
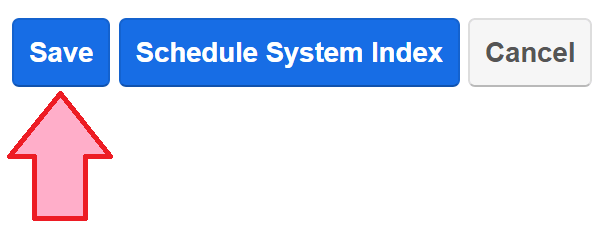
The task is to leave only those modules in Enabled Modules column on which the search will be performed in your system. You can do it by dragging the modules from one column to another. After adjusting Enabled Modules list, remember to save your changes by clicking «Save» button (Figure 4).
Step 3. Including Module Fields in GS Index
It is worth mentioning that the search will be performed only on the fields of the module in which the corresponding attribute is set. You can add a field into the search either with the help of Studio or manually by adding a code to variable definitions module section.
To set the attribute of participation in the SE through Studio, go the following way:
1 | Admin -> Developer Tools -> Studio -> [Module] -> Fields -> [Field] |
where
- [Module] is an application block containing the field
- [Field] is a field to be added to the GS index
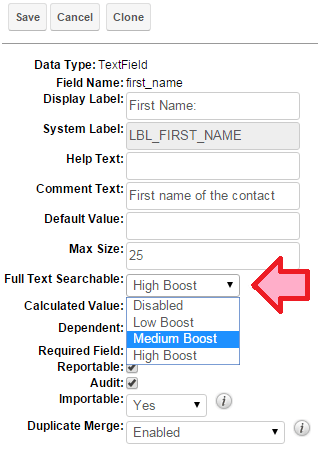
In the newly opened window, we are interested in «Full Text Searchable» section (Figure 5). This attribute may have the following values:
- Disabled – will be chosen if the field is not available in the GS
- Low Boost – means a low priority
- Medium Boost – means a standard priority
- High Boost – means a high priority
While displaying the results of the search, the field with a higher priority will have an advantage, i.e. the found entry will be listed higher. When changing the priority of the field, readjustment of the system is necessary for amendments to take effect.
To set the attribute of participation in the GS manually, it is necessary to find variable definitions file for a specific application block in the directory with installed SugarCRM. It will be found by the following way:
1 | \custom\Extension\modules\[Module]\Ext\Vardefs\*.php |
where [Module] is the application block containing the field.
If this directory has no files or does not exist at all, then you should create it. Add the following lines in an existing or newly created file (the example is shown for one field):
1 2 3 4 5 | $dictionary['Contact']['fields']['twitter']['unified_search'] = true; $dictionary['Contact']['fields']['twitter']['full_text_search'] = array( 'enabled' => true, 'boost' => 1, ); |
In this example, we include «twitter» field from Contacts application block in the GS. The value of «boost» parameter lies within the range [1..3], where 1 is a low priority, and 3 is a high priority.
After these manipulations, you have to reset rights to the file / directory (if you created it) and run «Quick Repair and Rebuild» operation.
Step 4. Final Verification
Sugar CRM enables launching an index in two ways:
1. Manually from the GS setup section (the one we have modified in steps 1 and 2)
2. Using the Task Scheduler
This tutorial will consider both approaches. The main difference between them is that the first approach presupposes that the full indexing of the system should be performed once, whereas the second one guarantees the full indexing of the system only after a set period of time.
Disabling the Scheduler
The first step is to check whether the task list of the Scheduler has an assignment, in which the value of «Job» states «function::performFullFTSIndex». To do this, go the following way:
1 | Admin -> System -> Scheduler |
and in each of the tasks, check the property of «Job» (Figure 6). If there are such tasks, they should be turned off for some time (enter Status = «Inactive»).

Truncating the Queue for Indexing
At this stage, we check whether there are some records in fts_queue table. If there are some, they should be deleted.
1 | TRUNCATE fts_queue; |
This table stores the records that are in the queue for indexing by the ES server. Since we are running a full index of the system, there should be no records in fts_queue table.
Deleting Previous Tasks from GS Scheduler
Now we check whether there are records in job_queue table, which fall under «WHERE» condition from the query below. If there are some, they should be deleted.
1 2 | DELETE FROM job_queue WHERE name LIKE 'FTSConsumer%' AND deleted = 0; |
This table stores completed and pending tasks of the Scheduler.
During primary initialization of mechanism of indexing records for the GS the set of tasks of the Scheduler is created, with its name written in the following format:
1 | «FTSConsumer » + [MODULE_NAME] |
There will be as many such records as there are application blocks of the system involved in the GS. Since we are running an initial index there should be no such tasks.
It is also worth mentioning that each of the tasks of the GS Scheduler can have either status «queued» when pending, or status «running» when executed. This ensures that the GS index remains up-to-date.
Adjusting the Size of the Package of the Processed Records in One Go
Each of the tasks of the GS Scheduler starts according to the queue and indexes records of its module in packs of N records each, where N = 15,000 (by default). If you have, for example, 120,000 non-deleted Contacts in the system, the task of indexing Contacts will have to start 120,000/15,000 = 8 times. Therefore, we can increase the number of records processed in one go. To do this, we add the following line in config_override.php file:
1 | $sugar_config['search_engine']['max_bulk_query_threshold'] = 25000; |
where 25,000 is the size of the pack of records.
Step 5. Initialing an Index
So, the final preparations are made, and we can launch an index.
Manual Start
If you have chosen this approach, go to the GS control section on the Administration panel:
1 | Admin -> System -> Search |
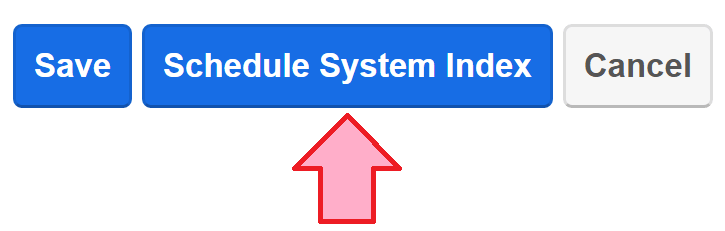
To start an index, click «Schedule System Index» button (Figure 7).
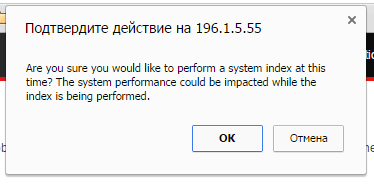
Next, confirm that you want to perform a full system index (Figure 8).
At the next step, you need to select the modules for which an index is performed. In our case – all of them (All). Also, it is necessary to put a tick (there is only one in the box). This will tell the system that we want to remove the old index and create a new one (Fig. 9).
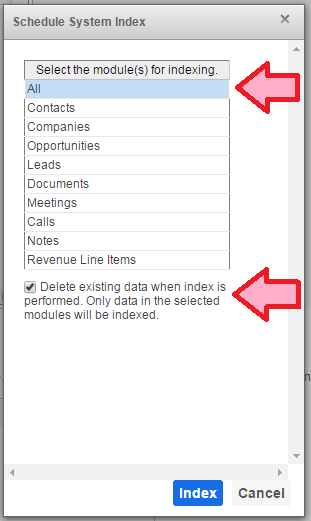
Upon making settings, press «Index» button. The system will notify that the main task of the Scheduler for performing an index has been created and will be launched soon (Figure 10). It is this task that will create the children when performed (those, the names of which begin with «FTSConsumer»). They, in turn, will begin processing records for each application block separately. Also, our main task will fill the queue for indexing (fts_queue table), which consists of all the modules of non-deleted records involved in the GS.

Start Using the Task Scheduler (Cron)
So, you have decided to launch an index by using the Task Scheduler. First of all, in order to do this, you need to have the task itself. There are 2 options:
- the task has already been created, but is disabled (we have disabled it successfully in Step 4)
- the task does not exist
In the first case, you should only add Status = «Active» to the task and save it. In the second case, the task is to be created. To do this, go to the Scheduler section on the Administration panel:
1 | Admin -> System -> Scheduler |
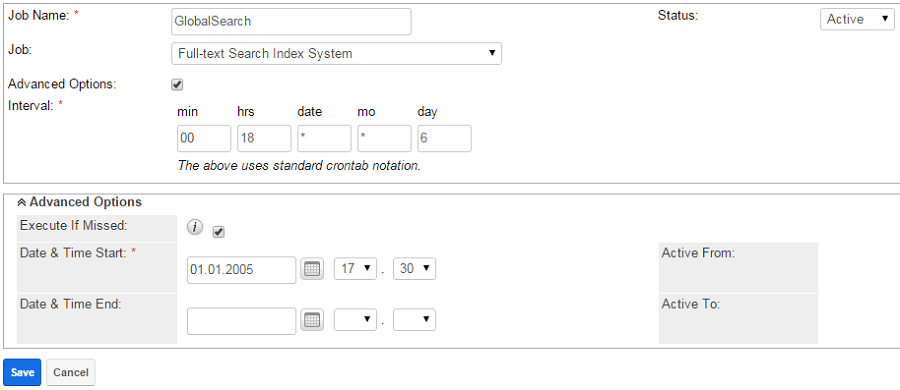
Select Create Scheduler in SugarScheduler menu. On the newly opened form fill Job Name with an arbitrary name (for example, «Global Search»), and in the drop-down list of Job field select «Full-text Search Index System». Also, remember to check Status box that should have «Active» value (Figure 11).
Utmost attention should be paid to Interval field. Launch frequency of the task should be set to a fairly long period of time (for example, once a week). This is due to the fact that if repeated frequently (once every 2 hours) the system will not have enough time to index all the records. Figure 11 demonstrates that the Task Scheduler is set to launch every 6 days at 18:00.
When the adjustment is completed, press «Save» button. The task will be launched according to the schedule.
Description of the Indexing Mechanism Procedure
1. fts_queue table is filled with all the records from all application blocks, on which the global search is performed.
2. The Scheduler’s tasks of indexing the records from each application block are run in turns indexing the records of their module in packs of N records each.
3. After an indexing procedure, the corresponding records are deleted from fts_queue table.
4. When each record is saved in the application block, involved in the GS, it falls within fts_queue table as a new record. The next time you launch the appropriate task of the Scheduler, it will be indexed.
Conclusions
Our SugarCRM customization is done. We’ve described the basic concepts of Global Search operating mechanism in SugarCRM. Also, a detailed guide for setting up this mechanism prior to its first launch was provided.
Good luck! Below you’ll find our contact form – use it in case if you have any questions on how to customize SugarCRM. We’ll be glad to help you!
Other SugarCRM customization tutorials: